Mecrisp-Cube for the Flipper Zero
Intro
Instant real-time programming with Forth.
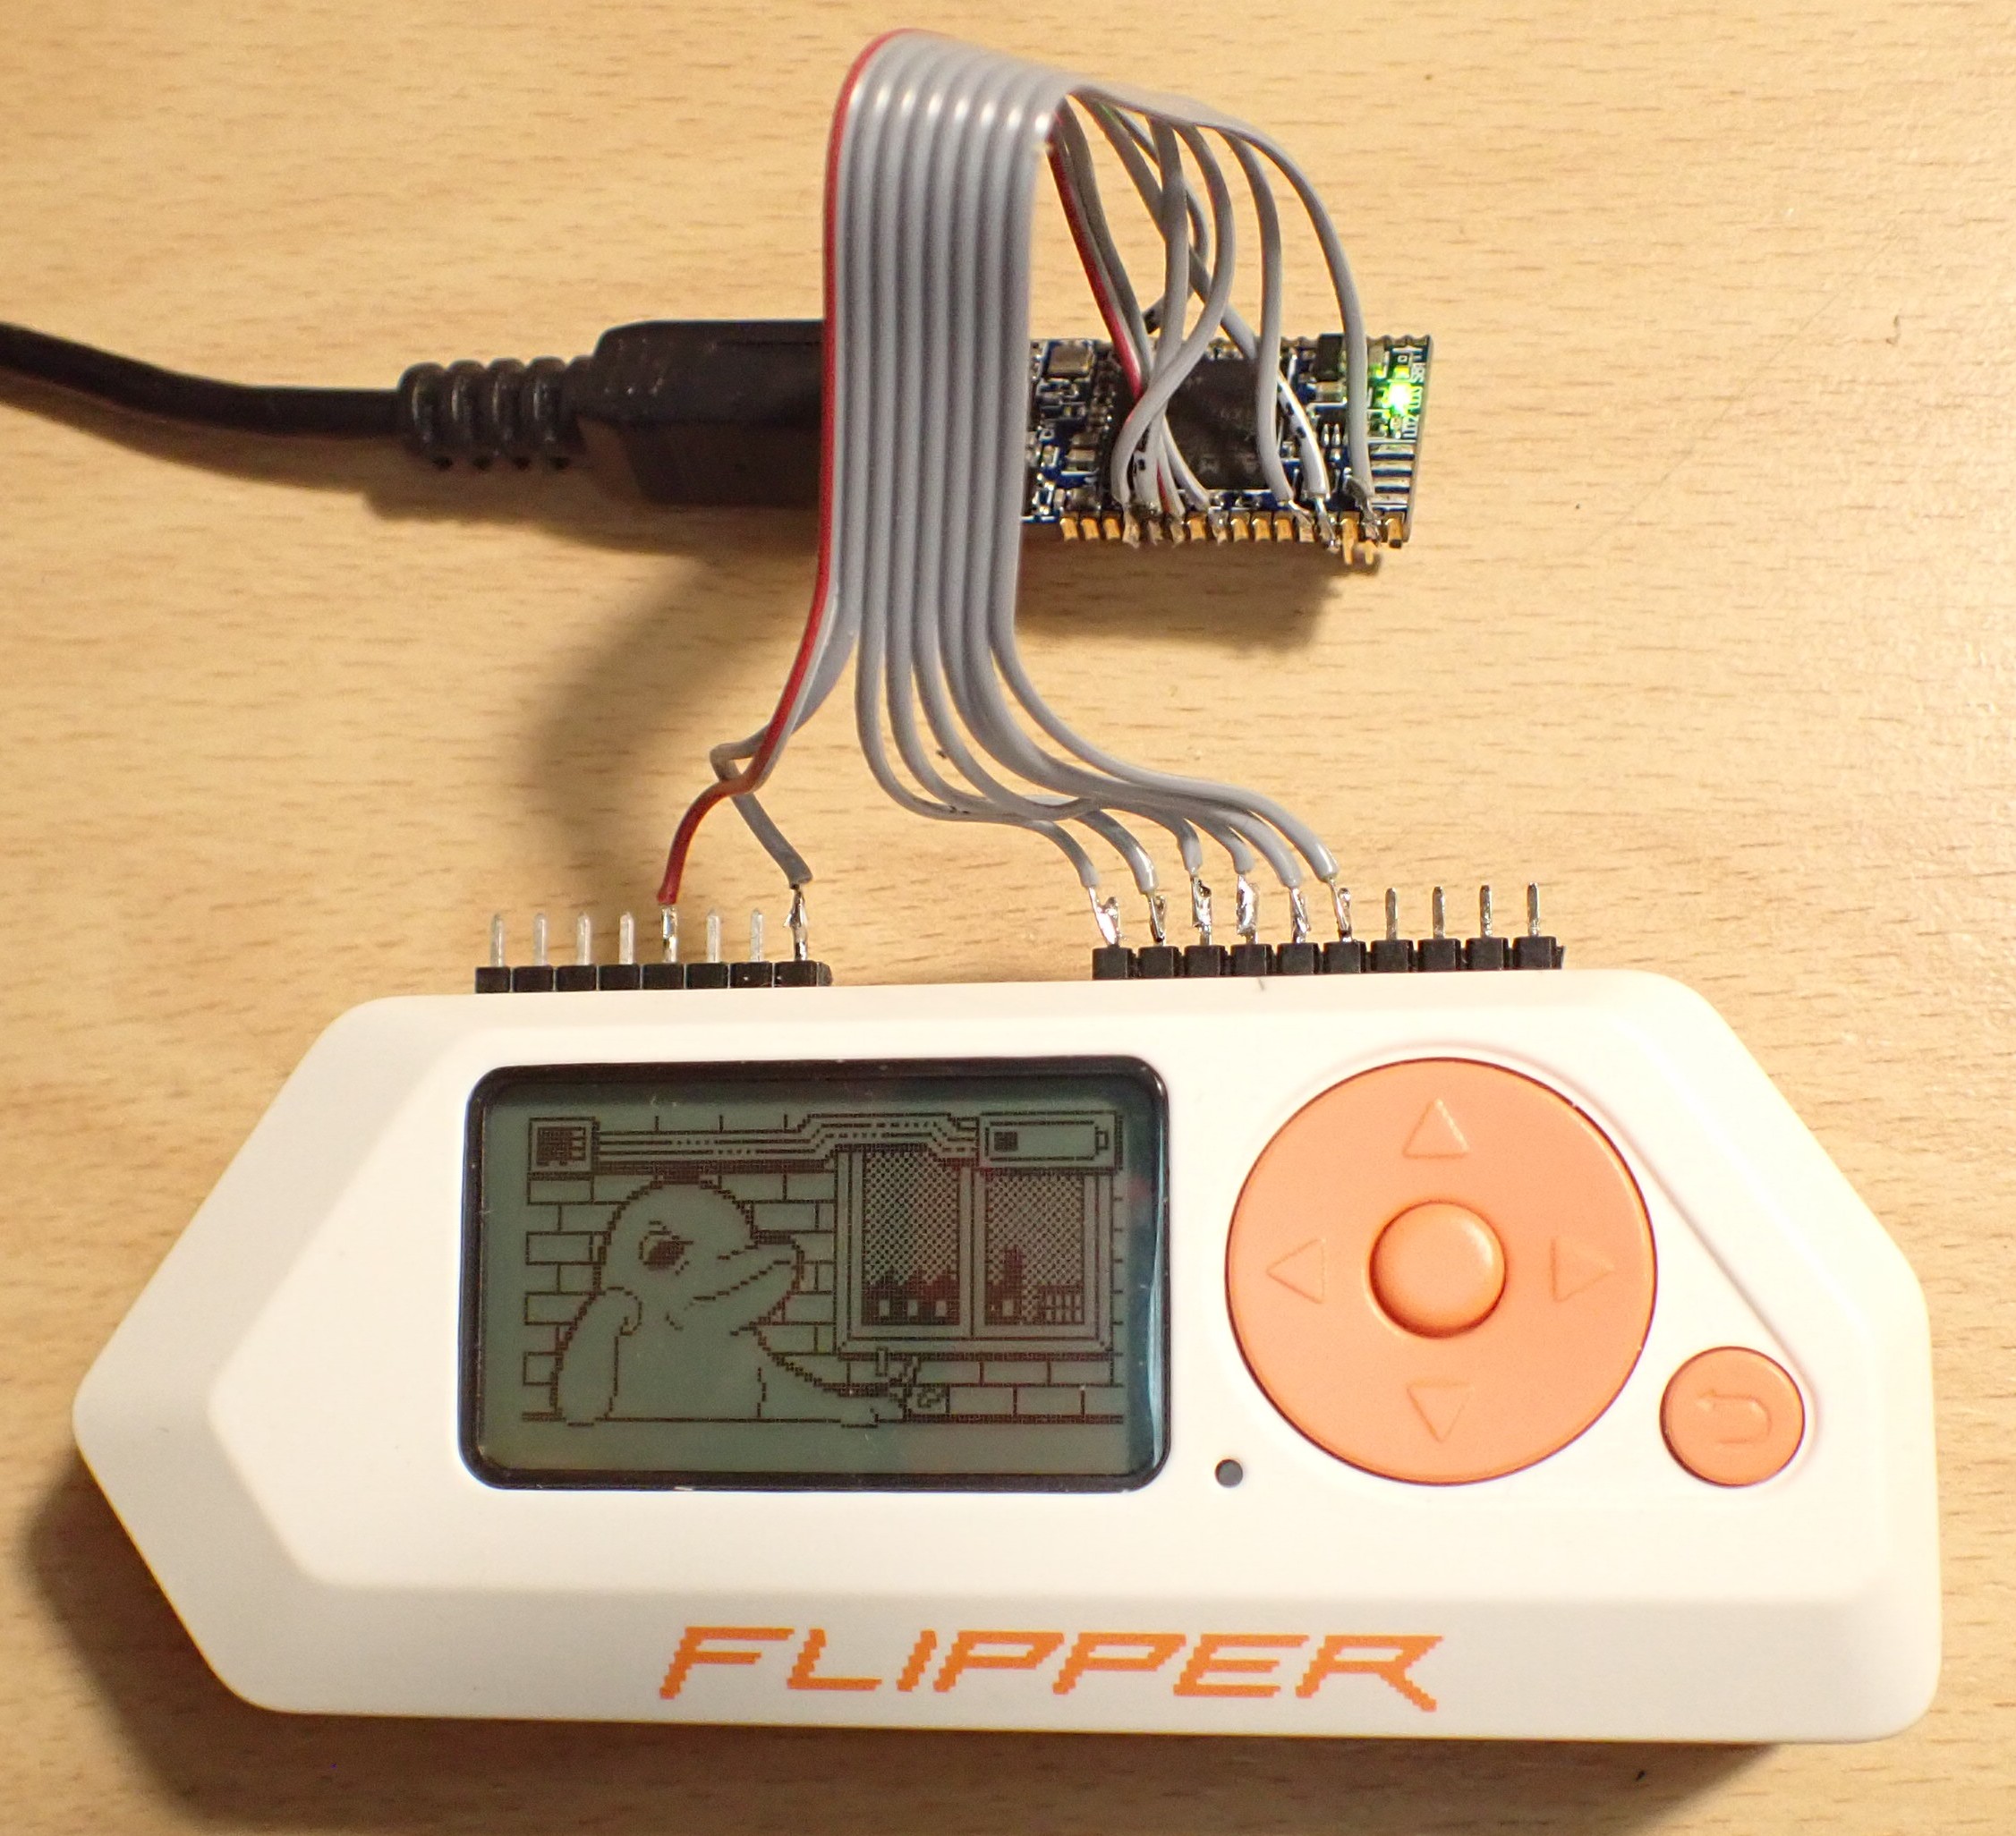
The Flipper Zero is an excellent portable tool for interaction with access control systems.
But the display, the buttons, LIPO (2.1 Ah), GPIO, BLE, SD-Card, RTC, etc. make it also an ideal tool for programming on the go.
This page is no longer updated regularly, the current documentation can be found at
GitHub (Flipper branch on Mecrisp-Cube). Sources are also there.
is an excellent portable tool for interaction with access control systems.
But the display, the buttons, LIPO (2.1 Ah), GPIO, BLE, SD-Card, RTC, etc. make it also an ideal tool for programming on the go.
This page is no longer updated regularly, the current documentation can be found at
GitHub (Flipper branch on Mecrisp-Cube). Sources are also there.


Contents
Features
The standard Mecrisp-Cube features like RTOS, Filesystem, USB, etc.- 63 KiB RAM dictionary
- 128 KiB Flash Forth dictionary
- 50 KiB for C code
- Internal Flash drive 0:, 384 KiB (for details see Nucleo)
- Serial console UART / USB CDC / BLE
- microSD drive 1:
- Control (5-button joystick, Back button, Reboot)
- LCD display 128x64 pixel
- RGB LED
- Power (LIPO charger and fuel gauge)
- Vibration Motor
- GPIO
- Sub-1 GHz Transceiver
- 125kHz RFID
- NFC
- Infrared Transceiver
- iButton
- Buzzer/Speaker
Getting Started
These instructions will get you a copy of the project up and running on your local machine (Flipper Zero) for development and testing purposes.Prerequisites
- Flipper Zero with STM32WB55 MCU (Cortex ARM M4) runs at a 32 MHz (the Bluetooth stack runs on a Cortex ARM M0+ core).
- Optional: ST-Link V3 Developer Board or you can build your own e.g. with a STLINK-V3MINI and some cables, see BoardSupportPackageFlipper#JTAG_SWD_Adaptor
- Terminal emulator application for PC, e.g.:
- PuTTY - Windows and Linux
- Tera Term - Windows
- Realterm - Windows
- minicom, microcom, screen - Linux
- Use the built in Eclipse console (but no LF)
- for details see TerminalIO
- PuTTY
- STM32CubeProgrammer or qFlipper
Flash the Mecrisp-Cube Firmware
Flash the Mecrisp-Cube binaryMecrispCubeFlipper.bin) or better the fs-util-binaryMecrispCubeFlipperFS.bin) to the Flipper Zero. Using the built-in USB DFU bootloader, see also firmware recovery- Press and hold the OK and the back buttons for 30 s (you should see a blank screen)
- Connect the Flipper Zero USB to the PC
- Program the binary (
MecrispCubeFlipper.binorMecrispCubeFlipperFS.bin) with- the STMCubeProgrammer (select USB Device), for Linux
sudo /usr/local/STMicroelectronics/STM32Cube/STM32CubeProgrammer/bin/STM32CubeProgrammer - or the qFlipper with install from file
- the STMCubeProgrammer (select USB Device), for Linux
- Reboot your device by pressing and holding the left and back buttons
Switch On/Off, Buttons, LED
- Switch Off
- press and hold the BACK-Button for 5 s or type in the command
halt - Switch On
- press the BACK-Button
- Reset
- press and hold the BACK- and LEFT-Button
Special Functions on Startup
USB-CDC is the default console.- Button UP
- CRS (Bluetooth Cable Replacement Service) is standard console
- Button DOWN
- UART is standard console
- Button RIGHT
- do not include
0:/etc/rc.local
RGB LED as Status Indicator
The RGB LED displays the status- dimmed Green
- LIPO fully charged
- dimmed Red
- LIPO charging
- dimmed Blue
- BLE connected
- flashing Red
- "disk" (serial flash or SD) write operation
- flashing Yellow
- "disk" (serial flash or SD) read operation
Use the Terminal (USB CDC)
Connect the Flipper Zero USB to the PC. Start the terminal emulator application on the PC. Check for the serial communication port (e.g. for Linux/dev/ttyACM0).
I set the putty terminal configuration to
- Implicit CR in every LF
- Local echo: Auto
- Local line editing: Auto
- Keyboard Backspace: Control-H
- Keyboard Function: Keys VT100
- Remote character set: CP850
Mecrisp-Stellaris RA 2.5.4 by Matthias Koch.

Mecrisp-Cube 1.5.0 for STM32WB Flipper, 63/128  KiB RAM/FLASH dictionary (C) 2023 peter@spyr.ch
  * Firmware Package STM32Cube FW_WB V1.17.3, USB-CDC, BLE Stack 5.3 (C) 2023 STMicroelectronics
  * CMSIS-RTOS V2 FreeRTOS wrapper, FreeRTOS Kernel V10.3.1 (C) 2020 Amazon.com
  * FatFs for internal flash and microSD - Generic FAT fs module  R0.12c (C) 2017 ChaN
include 0:/etc/rc.local
Use the interpreter:
23 5 / .[CR] 4 ok.Type in your first Forth program:
: hello ." World" ;[CR]  ok.
hello[CR] World ok.
Additional Tools and Local Filesystem
Populate a microSD with the contents of sdcardls -l 1:[CR] drw- 0 2021-04-18T18:12:38 boot drw- 0 2021-03-21T18:47:52 etc drw- 0 2021-03-21T18:47:54 fsr drw- 0 2021-03-21T18:47:54 home drw- 0 2021-03-21T18:47:56 man -rwa 7219 2021-01-08T19:42:36 README.md ok.You can use the local CLI commands like
mkfs, mkdir and cp to create a filesystem on the serial flash and fill it with files and folders. But this is tedious job because I haven't yet implemented a recursive copy for MecrispCube. But there is prepared disk image
(for details see MicroSdBlocks#Serial_Flash) on microSD and the tool dd. You can copy the disk image to the drive 0: (this takes about 8 Minutes):
dd 1:/boot/fd-384KiB.img 0:[CR]
 ok.
mount 0:[CR]
 ok.
ls 0:[CR]
man                     fsr                     README.md               boot
etc                     home
 ok.
The Mecrisp have some tools bundled in its distribution e.g. assembler, disassembler, dump, float. I put those tools and some more into the folder
/fsr. With the "init.fs script" I compile my favorite ones into the flash directory (if you use the fs-util-binarycompiletoflash[CR] ok. include /etc/init.fs[CR] init.fs Loading started RAM Dictionary: 392991 KiB utils.fs loading ... conditional.fs loading ... dump.fs loading ... disassembler-m3.fs loading ... float.fs loading ... threads.fs loading ... RAM Dictionary: 392981 KiB init.fs finished ok.For example, the word disassember is available now:
see dump[CR]
080405F0: B500  push { lr }
080405F2: F7C2  bl  08002A3E  --> cr
080405F4: FA24
080405F6: CF08  ldmia r7 { r3 }
080405F8: F013  ands r2 r3 #F
080405FA: 020F
080405FC: F847  str r3 [ r7 #-4 ]!
080405FE: 3D04
08040600: 2A00  cmp r2 #0
08040602: D000  beq 08040606
08040604: 3610  adds r6 #10
08040606: CF08  ldmia r7 { r3 }
08040608: F847  str r6 [ r7 #-4 ]!
Flash the original Flipper Firmware
If you want to go back to the original firmware, do the following- Press and hold the OK and the back buttons for 30 s (you should see a blank screen)
- Connect the Flipper Zero USB to the PC
- Flash the Flipper firmware with qFlipper REPAIR
- Reboot your device by pressing and holding the left and back buttons
Installing Development Environment
A step by step series of examples that tell you how to get a development env running Install the IDE STM32CubeIDEpsi@homer:~> git clone --branch Flipper https://github.com/spyren/Mecrisp-Cube Klone nach 'Mecrisp-Cube' ... remote: Enumerating objects: 1157, done. remote: Counting objects: 100% (1157/1157), done. remote: Compressing objects: 100% (620/620), done. remote: Total 3183 (delta 720), reused 934 (delta 525), pack-reused 2026 Empfange Objekte: 100% (3183/3183), 41.60 MiB | 6.96 MiB/s, Fertig. Löse Unterschiede auf: 100% (2100/2100), Fertig.Import the project into the IDE:
File -> Import -> General -> Existing Projects into Workspace -> Select root directory
Copy project into workspace
Browse to Mecrisp-Cube directory
Generate code from the STM32CubeMX
MecrispCubeFlipper.ioc file:
Project -> Generate CodeRestore changed source files
$ git status
{list of changed files}
$ git restore {files to restore}
Select the Build Configuration (Debug if you want to debug the project) and Build the project:
Project -> Build Configurations -> Set Active -> Debug/Release
Project -> Build Project

This work by Peter Schmid is licensed under a Creative Commons Attribution-ShareAlike 4.0 International License. Sitronix ST7567


| I | Attachment | History | Action | Size | Date | Who | Comment |
|---|---|---|---|---|---|---|---|
| |
flipper-header.jpg | r1 | manage | 47.3 K | 2023-12-02 - 09:42 | PeterSchmid |
Topic revision: r20 - 2023-12-31 - PeterSchmid

Ideas, requests, problems regarding TWiki? Send feedback